
Table of Contents
- Step 1: Stop the Source and Make the Area Safe
- Step 2: Spot the Signs of a Slab Leak Before You Tear Into Anything
- Step 3: Extract Standing Water and Start Structural Drying
- Step 4: When to Call Emergency Water Extraction Services
- Step 5: How to Prevent Mold After a Leak in the First 48 Hours
- Step 6: Handle Wet Materials Correctly (and Know What to Throw Out)
- Step 7: Document Everything for Your Insurance Claim
- Frequently Asked Questions
Last Updated: September 11, 2026
Step 1: Stop the Source and Make the Area Safe
Learning how to mitigate water damage starts with one move: kill the water at its source. Shut off the main supply valve and cut power to any flooded room at the breaker panel. This guide walks through seven steps to limit damage before a crew arrives.
Safety comes before speed. Standing water and live outlets are a lethal combination, and a sewage backup carries contaminants that require skin and eye protection. The CDC guidance on floodwater safety treats floodwater as a health hazard, not just a mess.
- Shut off the main water valve or the fixture supply line
- Kill power to wet rooms at the breaker
- Photograph the source before you touch anything
- Put on boots, gloves, and eye protection if the water is dark or smells foul
If the leak is inside a wall or under the slab, the valve may not stop it. That’s when you call a licensed plumber rather than guess.
Step 2: Spot the Signs of a Slab Leak Before You Tear Into Anything
The signs of a slab leak rarely look like a geyser. Most show up as a warm floor spot, a water bill spike, running water when every fixture is off, or a hairline crack that keeps reappearing in the same tile.
Older homes in Punta Gorda and Englewood sit on decades-old copper lines that fail quietly. A plumber confirms the location with acoustic listening or thermal imaging before concrete comes up.
Never break into a slab on a hunch. Cutting the wrong spot turns a pipe repair into a structural repair, and the concrete pour, tile match, and subfloor work can cost far more than the leak itself.
If you see multiple signs at once, treat it as active and call for detection.
Step 3: Extract Standing Water and Start Structural Drying
Standing water comes out first, then drying begins. A wet/dry shop vacuum handles shallow water on hard floors, but soaked carpet needs a weighted extraction pass to pull water from the pad and subfloor.
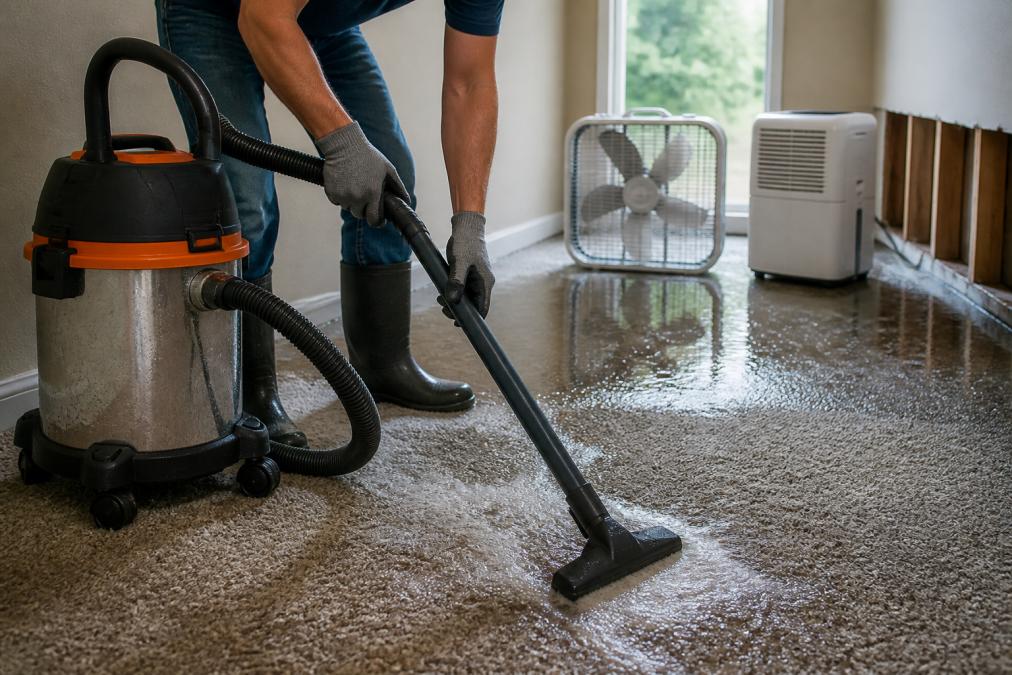
Once the surface is clear, drying is a numbers game. A hygrometer reads moisture in walls and floors, a dehumidifier pulls vapor from the air, and box fans keep air moving. Structural drying means drying the assembly, not just the carpet.
| Material | Dry Time (Ideal Conditions) | Watch For |
|---|---|---|
| Carpet and pad | 24-48 hours | Delamination, odor |
| Drywall | 24-72 hours | Soft paper, wicking stains |
| Hardwood | 3-7 days | Cupping, buckling |
| Concrete subfloor | 3-5 days | Trapped moisture under flooring |
Keep relative humidity low and the HVAC running to help evaporation. Open windows only if outdoor humidity is lower than indoors.
Step 4: When to Call Emergency Water Extraction Services
Emergency water extraction services make sense the moment water is more than a towel can handle, or once it reaches carpet, drywall, or a subfloor. The longer water sits, the more it wicks into wall cavities and the higher its category becomes.
Call for extraction when:
- Water covers more than a small area or has soaked into flooring
- The source is a sewage backup or gray water from an appliance
- You smell musty odors within the first day
- The affected space includes a finished basement or a room with no drainage
For urgent calls, a typical 60-to-90-minute arrival window is provided, and every job starts with a transparent estimate before work begins.
Step 5: How to Prevent Mold After a Leak in the First 48 Hours
Mold prevention is a race against the clock. Mold can begin within 24 to 48 hours of a leak, so the first two days decide whether you’re drying a room or remediating one (the CDC).
- Get moisture content in walls and flooring below the safe threshold fast
- Run a dehumidifier continuously, emptying it or routing the drain
- Keep air circulation moving with fans angled across wet surfaces
- Remove wet cardboard, paper, and fabric that hold moisture
- Check hidden spots: under cabinets, behind baseboards, inside closets
The EPA’s mold cleanup guidance recommends fixing the water problem first, because mold returns wherever moisture remains. If you see or smell mold after drying, that’s a remediation job, not a wipe-down.
A cheap hygrometer from a hardware store tells you more than your nose does. Aim to bring affected materials back to the same moisture reading as an unaffected wall in a dry room before you call the job done.
Step 6: Handle Wet Materials Correctly (and Know What to Throw Out)
Most guides say “dry what you can and toss what you can’t.” That fails when you’re facing three flooring types and a soaked cabinet run. The decision changes by material, how long the water sat, and its category.
Flooring, by type
- Hardwood (solid): Cupping and crowning come first. Dry within 24 to 48 hours with air movers and a dehumidifier; many solid hardwood floors can be saved via mat-drying or injection-drying. If boards buckle at the seams or the finish lifts, it’s a loss. Never sand a wet floor, you’ll trap moisture and gouge it.
- Engineered hardwood and laminate: The core is the problem. Laminate’s fiberboard core swells permanently, and engineered planks delaminate at the wear layer. If water reached the seams, plan on replacement; if only the surface is wet and caught within hours, a wet/dry vacuum pass plus airflow can save it.
- Carpet and pad: The pad is almost always a loss, it traps water, compresses, and grows odor. Pull, bag, and dispose of it. The carpet can sometimes be saved with professional weighted extraction and a floating dry, but Category 2 or 3 water makes it a loss too.
- Tile and stone: The tile survives; grout and subfloor are the concern. Water wicks through grout lines into the thinset and subfloor. Dry the assembly, not just the surface, or you’ll get hollow-sounding tile and hidden mold.
- Vinyl and LVT: Water gets under the planks and stays there. If the subfloor is wood-based, it swells. Pull a few planks to check the subfloor before assuming the floor is fine.
Drywall: the cut-line decision
Drywall is the material homeowners get wrong most often. If the paper facing is intact and moisture hasn’t wicked more than a few inches above the flood line, it can dry in place with airflow and a dehumidifier. If the paper is soft, stained, or the drywall sags, cut it out.
The standard cut is 12 to 24 inches above the highest visible water line, enough to expose framing and the wall cavity for airflow. Cut a clean, straight line for easy patching. Never save drywall that touched Category 3 water; porous materials exposed to contamination must be removed, not dried.
Insulation
- Fiberglass batts: If they were saturated, they lose their loft and R-value and trap moisture against the framing. Remove and replace.
- Blown-in cellulose: It clumps, holds water, and is nearly impossible to dry in place. Remove it.
- Closed-cell spray foam: It’s closed-cell, it doesn’t absorb water. Wipe it down and dry the surrounding assembly.
- Rigid foam board: Non-porous. Dry the surface and check the framing behind it.
Cabinetry and furniture
Solid wood cabinets and furniture can often be saved with fast drying and airflow into the boxes. Particleboard and MDF, most modern cabinet boxes and budget furniture, swell, crumble, and delaminate; once edges puff, there’s no fix. Pull the toe kick and doors so air moves through.
Call Now For A Free Estimate ?
What to throw out, no debate
- Carpet pad
- Particleboard and MDF
- Saturated fiberglass and cellulose insulation
- Sagging or crumbled drywall and ceiling tiles
- Anything porous that touched Category 3 water
Water categories change the answer
- Category 1 (clean): Supply line, rain, or appliance water. Most materials are salvageable if you dry fast.
- Category 2 (gray): Washing machine discharge, dishwasher water, toilet bowl water (no feces). Porous materials are usually a loss; hard surfaces can be cleaned and sanitized.
- Category 3 (black): Sewage, ground-surface water, toilet trap water. Everything porous is a loss. Hard surfaces need disinfection, not just drying.
Category can also degrade over time, Category 1 water that sits for 48 hours in a warm room becomes Category 2. That’s why speed matters more than any single technique.
When in doubt, throw it out. A $200 section of drywall is cheaper than a mold remediation bill, and no adjuster will argue with a documented decision to remove contaminated material.
If you’re not sure whether a material is salvageable, photograph it, note the water category and how long it was wet, and call a professional before you start cutting. The wrong cut costs more than the right call.
Step 7: Document Everything for Your Insurance Claim
Insurance claims are won or lost on documentation, and most homeowners start too late, after moving furniture, pulling carpet, or tossing wet drywall. The evidence your adjuster needs is what you destroy when you clean up. Here’s the system that maximizes your payout.
The shot list: what to photograph before you touch anything
Work room by room. For each room, take this sequence:
- A wide shot from the doorway showing the entire room and the water line on the walls.
- A mid-range shot of the affected area, the source, the standing water, the wet furniture.
- Close-ups of the source, the burst supply line, the failed fitting, the crack in the slab, the overflowing appliance.
- Close-ups of the water line on drywall, baseboards, and cabinet toe kicks. Put a tape measure or a coin in the frame for scale.
- Close-ups of damaged items, the cupped hardwood, the swollen cabinet box, the stained ceiling.
- A shot of the moisture meter reading on each affected material, if you have one.
Then do a slow walkthrough video, narrating the date, time, room, what you see, and what you’ve done. Video captures what stills miss, running water behind a wall, a stain’s extent, a floor flexing underfoot.
Build the claim file
Keep everything in one folder, physical or digital. A complete file contains:
- The photo and video set above, backed up to cloud storage the same day. Phone photos get lost; cloud copies don’t.
- A written inventory of damaged items with approximate age, original cost if known, and replacement cost, furniture, electronics, clothing, rugs, and anything in a flooded closet or cabinet.
- Receipts for every emergency purchase, fans, dehumidifiers, wet/dry vac, extension cords, plastic sheeting, hotel stay, meals if displaced. Most policies cover these under “loss of use” or “reasonable expenses to prevent further damage.”
- A running log with dates and times: when you discovered the loss, shut off the water, called the plumber, when the mitigation crew arrived, when you called your insurer. Adjusters use this timeline to verify the claim.
- The plumber’s written report identifying the cause. This is the backbone of the claim. A report that says “supply line failed at the compression fitting due to corrosion” is worth far more than “pipe leaked.”
- Your policy declarations page so you know your deductible, coverage limits, and whether you have replacement-cost or actual-cash-value coverage. The difference can be thousands of dollars on the same loss.
How adjusters actually evaluate the claim
Adjusters look for three things: cause, extent, and mitigation effort. Cause determines coverage, a sudden burst pipe is covered; long-term seepage or neglect usually isn’t. Extent determines payout, they need the full scope, not just visible damage. Mitigation effort determines reimbursement for emergency expenses, receipts and a timeline prove you acted reasonably.
This is why you document before you clean. Once the wet drywall is in a dumpster and the carpet is at the curb, you’ve destroyed the evidence the adjuster needs to justify the payout.
Report promptly, most policies require it
Most policies require prompt reporting and reasonable steps to prevent further damage. Emergency mitigation, shutting off water, extracting standing water, running dehumidifiers, is usually covered, not penalized. Call your insurer first, document everything, then get the contractor’s estimate.
If the claim is denied or underpaid
Ask for the denial in writing with the specific policy language cited. If the adjuster’s scope misses documented damage, send your photos and the plumber’s report and request a re-inspection. If you still disagree, most policies have an appraisal clause, each side hires an appraiser and a neutral umpire resolves the difference. You can also complain to your state’s department of insurance.
Document before you clean. The single best thing you can do for your claim is capture the damage while it’s still there, photos, video, moisture readings, and a written timeline. Everything else is replaceable; the evidence isn’t.
If a slab leak or hidden pipe failure is the cause, the plumber’s written findings become the backbone of the claim. Get that report in writing, keep every receipt, and don’t throw anything out until your adjuster has seen it.
Frequently Asked Questions
Can I do water mitigation myself?
You can handle small, clean-water spills yourself: shut off the source, soak up what you can with towels, and run fans and a dehumidifier for 24 to 48 hours. Call a professional when water covers more than a small area, has been sitting longer than a day, comes from a sewage backup, or has soaked into carpet padding, drywall, or a subfloor. Those materials hold moisture that household fans cannot pull out fast enough, and hidden dampness leads to mold growth within days.
Does homeowners insurance cover water mitigation?
Most policies cover mitigation for sudden, accidental events like a burst pipe or failed water heater, but not gradual leaks or flooding, which needs separate coverage. Save every receipt for fans, dehumidifier rentals, and any professional water extraction services, because insurers usually reimburse reasonable mitigation costs that prevent further property damage. Call your insurer before you throw anything away, and photograph all damaged items first so your claim stays intact.
How quickly does mold grow after water damage occurs?
Mold can start growing within 24 to 48 hours of water intrusion on damp drywall, wood, or carpet. That window is why structural drying matters so much: getting air circulation and a dehumidifier running the same day keeps relative humidity down and removes the moisture mold needs. If materials are still damp after two days, or you smell a musty odor, treat it as active mold growth and bring in a professional rather than painting over it.
What is the difference between water mitigation and water restoration?
Mitigation stops the damage from spreading: shutting off the water, extracting standing water, and drying the structure. Restoration rebuilds what was damaged, such as replacing drywall, reinstalling flooring, or repainting. Insurance claims often separate the two, so document the mitigation stage carefully with photos and moisture readings. The faster you mitigate water damage, the less restoration work you pay for later, which is why the first 24 hours matter most.